30 Mayıs 2012 Çarşamba

CIRCA - Custom Vinyl Banner - Skateboarders Footwear & Apparel - Measures : 70" X 47" Inches - "It's Time..." - Vertical - Rare - Out of Production - Limited Edition

To contact us Click HERE

CIRCA - Custom Vinyl Banner - Skateboarders Footwear & Apparel - Measures : 70" X 47" Inches - "It's Time..." - Vertical - Rare - Out of Production - Limited Edition

  • CIRCA - (C1RCA) - Skateboarders Footwear & Apparel
  • Custom Vinyl Banner - Measures: 70" X 47" Inches
  • Tagline: "It's Time..." - Vertical - Folded
  • Out of Production - Rare Collectible Banner
  • Limited Edition - Used
CIRCA - (C1RCA) - Skateboarders Footwear & Apparel - Custom Vinyl Banner - Measures: HUGE: 70" X 47" Inches - Tagline: "It's Time..." - Vertical - Folded - Rare - Out of Production - Collectible Banner - Used - Limited Edition

Price:

Find More Famous Footwear Products

Artsmith, Inc. Women's Flip Flops (Sandals) Halloween Witch and Famous with Witch Hat - Medium

To contact us Click HERE

Artsmith, Inc. Women's Flip Flops (Sandals) Halloween Witch and Famous with Witch Hat - Medium

  • Small is Women's Sizes 4-5.5
  • Medium is Women's Sizes 6-8.5
  • Large is Women's Sizes 9-11; X-Large is Women's Sizes 11.5-12
Product Number: 030-586829353 When you're looking for a pair of comfortable Flip Flops that will knock your socks off, look no further than these. These thong flip flops are water proof and reflect your style. Wear around the house, at the beach or to the mall. These decorated flip flop slippers will make for an endless summer of fun. Small is Women's Sizes 4-5.5. Medium is Women's Sizes 6-8.5. Large is Women's Sizes 9-11. X-Large is Women's Sizes 11.5-12.

List Price: $ 34.97 Price: $ 34.97

Sauteed Halibut with Romesco Sauce- Great for Lent!

To contact us Click HERE
I love the Lenten season.  It gives me an excuse to cook fish more often!  I recently saw a recipe in Cooking Light for Sauteed Halibut with Romesco Sauce and thought I would try it.  I followed the directions exactly and put my ancho pepper under the broiler for 2 minutes, but that was about a minute too long and it was burned to a crisp.  I headed over to the internet and started searching to figure out what to do about the ancho pepper and found MANY different variations of Romesco sauce.  The only common ingredients were red bell peppers, vinegar and nuts (hazelnuts or almonds).  After searching for a while, I went back into the kitchen and mixed up what I thought were the best parts of the recipes I looked at and came up with my own version!  It was wonderful!  Try it!
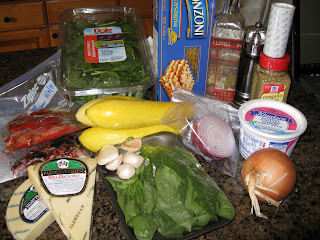
Here is what you use for Romesco Sauce:1 large red bell pepper1 slice of whole wheat bread1/2 c slivered almonds roasted1 can fire roasted tomatoes (drained)1 dried ancho pepper5 cloves garlicabout 1 TBS smoked paprika (I did to taste)1/8 tsp cayenne pepperabout 1 - 2 tsp chipotle chili powder (again, to taste)1/4 tsp sugarsalt and pepper to taste1 to 2 TBS red wine vinegar
about 1/2 cup olive oil

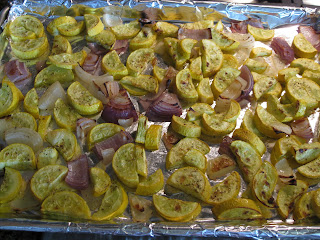
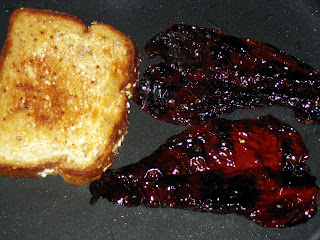
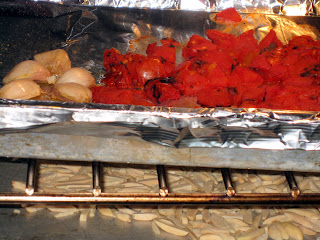
Preheat broiler.  Cut the bell pepper in half and remove seeds and stem.  Flatten on a baking sheet.  Put under broiler until skin is charred.  The pepper underneath won't be burned, but will be roasted to perfection.   Remove from oven and put in a zip lock bag to steam (makes it really easy to remove skin).  Once it has cooled a little, remove from bag and the skins will slip right off.  Meanwhile, cut ancho pepper in half and remove seeds and stem.  Then put a little olive oil in a skillet and toast the bread until it is nice and golden.  At the same time, put the ancho in the pan until it sort of starts to plump up a tiny bit and turn red in spots. Remove from pan and cut pepper into strips and tear bread.


When the bell peppers are done roasting, turn the oven to 350 degrees and put 5 garlic cloves (skin still on) on a baking pan and drizzle a tiny bit of olive oil on them, then mix them up so they are covered in olive oil.  I added my roasted tomatoes to the pan, but you could leave that step out if you wanted.  Pour 1/2 cup slivered almonds onto another baking sheet and put them all in the oven.  Roast until the garlic is soft (about 10-15 minutes, it will start to look a little browned).  Watch the almonds closely and remove when they are lightly toasted.  (I have ruined MANY batches of almonds by walking away from them for just a minute while roasting... they go from perfect to ruined very quickly).  Remove from oven and let the garlic cool enough so that you can squeeze the garlic out of the skin.


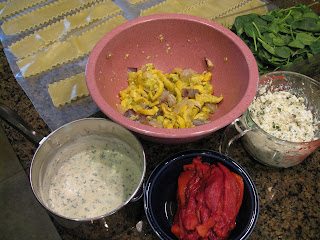
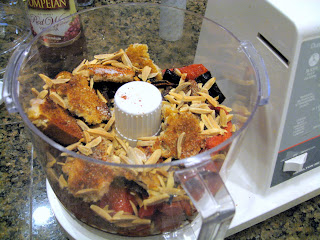
Next, add roasted bell peppers, ancho pepper, tomatoes, garlic and almonds to a food processor.  Add spices (I wouldn't use regular paprika, the smokiness of the smoked paprika is what made it taste so good).  Blend in food processor then drizzle in red wine vinegar and olive oil.  Taste it and adjust spices, vinegar and olive oil to your taste.


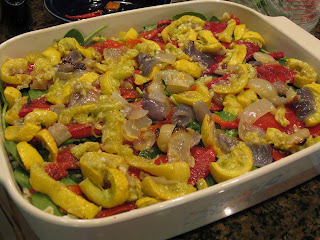
It's best to make the Romesco Sauce at least an hour ahead of time so that the flavors can meld.  I read that you can make it up to a week ahead of time.

For the halibut, I sprinkled a little kosher salt and fresh ground pepper on it, sprayed my skillet with my Misto Olive Oil Sprayer and sauteed until it was done.   (see my post here for info on the sprayer)

Doesn't this look delicious??   YUMMY!

Here is the rice recipe from Cooking Light:
Serve with Nutty Rice: Cook 1 cup basmati rice according to package directions. Stir in 1/4 cup thinly sliced green onions, 2 tablespoons toasted slivered almonds, 1/4 teaspoon salt, and 1/4 teaspoon black pepper. Yield: 4 servings. CALORIES 191; FAT 2g (sat 0.2g); SODIUM 152mg


Linking to:
A Thrifty Mom- Look What I made,
Time Warp Wife- {Titus 2}SDAYS
A Southern Fairytale- Mouthwatering Mondays

Roasted Vegetable Lasagna

To contact us Click HERE

Roasted-Vegetable Lasagna

Cooking Light
A couple of weeks ago I found a recipe for Roasted Vegetable Lasagna on My Recipes and posted it on my Facebook wall.  My husband called from work, excited that we were having that for dinner.  Hated to break it to him, I wasn't cooking it that night, just ran across it that day.  Every day for over a week, he asked me if we were having it that night.  FINALLY, I broke down and made it... and it was SOOO worth the wait!
Vegetables:
    4 red bell peppers1 teaspoon olive oil1/2 teaspoon salt1/2 teaspoon black pepper6 yellow squash, halved lengthwise and cut into 1-inch pieces (about 1 1/2 pounds)1 large onion, cut into 16 wedges (I used half of a purple onion and half a yellow)4 garlic cloves, minced Cheese mixture:2 cups 2% low-fat cottage cheese1 1/2 cups (6 ounces) grated sharp provolone cheese1/4 cup chopped fresh basil1 teaspoon dried oregano White sauce:3 tablespoons all-purpose flour1 1/2 cups 2% reduced-fat milk2 tablespoons chopped fresh basil1/4 teaspoon black pepper
    Cooking spray9 cooked lasagna noodles (lay them out on waxed paper after cooking to keep them from sticking)2 cups spinach leaves, divided1/2 cup (2 ounces) shredded part-skim mozzarella cheese


Cut bell peppers in half and remove seeds and stems. Put pepper halves on a foil-lined baking sheet; flatten with hand. Broil 15 minutes or until blackened. Place in a zip-top plastic bag; seal. Let stand until it cools a little. Peel; set aside. (There are only 2 peppers here because I still had a couple of roasted peppers in my freezer from the end of summer- that's what's in the ziplock bag above- They freeze wonderfully)


After you take the peppers out, change oven temp to 450°.Combine oil, salt, 1/2 teaspoon black pepper, squash, and onion on a baking sheet; toss well. Bake at 450° for 20 minutes. Remove from oven; combine squash mixture and garlic in a bowl.


Decrease oven temperature to 375°.To prepare cheese mixture, combine cottage cheese and next 3 ingredients (cottage cheese through oregano) in a bowl.To prepare white sauce, mix flour and milk in a medium saucepan (I mix the flour and half of the milk in a measuring cup until it's smooth, then add the mixture with the rest of the milk to the sauce pan and mix well-  less lumps).  Cook over medium heat until thick; stir constantly. Remove from heat; stir in 2 tablespoons chopped basil and 1/4 teaspoon black pepper.

Spread 1/4 cup white sauce in bottom of a 13 x 9-inch baking dish coated with cooking spray. Arrange 3 noodles over sauce; top with 1 & 1/4 cups cheese mixture, 1 cup spinach, 4 bell pepper halves, 2 cups vegetable mixture, and 1/4 cup white sauce. Repeat layers, ending with noodles. Spread remaining white sauce over noodles.  (Here is what it looked like before the final layer of sauce, noodles and cheese.  I thought it looked pretty.  Wanted to get a spoon and start eating right away!)

Cover and bake at 375° for 15 minutes. Uncover; sprinkle with mozzarella cheese. Bake an additional 20 minutes.  

L'Oréal® Paris The One Sweep™ Eye Shadow and Double Extend™ Eye Illuminator Mascara

To contact us Click HERE
As you may remember, I'm a BzzAgent.  I get free or discounted products to try out and then I tell my friends what I think about the products.  With one of my most recent BzzCampaigns, I was given L'Oreal The One Sweep Eye Shadow and L'Oreal Double Extend Eye Illuminator mascara.   Here's a little information about them.L'Oréal Paris® The One Sweep™ Eye Shadow
  • Defines, colors and highlights in one easy sweep
  • Features a one-of-a-kind applicator designed to fit the shape of your eye to easily achieve a complete look
  • Coordinated shadows come in natural and playful palettes expertly designed to enhance your eye color
    • Blue
    • Green/Hazel
    • Brown
  • Additional expertly selected palettes available to enhance all eye colors
  • Suggested to retail for $9.95

Expert tips and tricks
Getting the complete and eye-catching looks you want is simple with both L'Oréal Paris® The One Sweep™ Eye Shadow and Double Extend™ Eye Illuminator mascara, but here are a few additional tips from the pros to ensure you always look your best:
L'Oréal Paris® The One Sweep™ Eye Shadow
  • Apply with the darkest shade along your lash line
  • For best results, align the tip of the applicator with the inside corner of your eye — then sweep across your lid for perfectly applied shadow every time
  • Use the applicator to blend upwards across your lid for a truly professional effect

When I got it in the mail, I was pretty skeptical.  I figured the eyeshadow was just another gimmick the makeup companies are putting out to get everyone to try their product.  Let me tell you, I was really surprised!  It really works and is really as easy as advertised.  It was a little awkward applying it the first time (trying to figure out how to hold the applicator and which way to apply it), then I remembered the information that came along with my BzzKit and looked at the picture above and it clicked.  

L'Oréal Paris® Double Extend™ Eye Illuminator

  • Professionally developed to enhance and illuminate your eyes
  • Lengthens, intensifies and illuminates in two simple steps
  • Clump-free, flake and smudge resistant
  • Available in four shades
    • Black Copper for Blue Eyes
    • Black Bronze for Green/Hazel Eyes
    • Black Quartz for Brown Eyes
    • Black Crystal for All Eyes
  • Ophthalmologist- and allergy-tested
  • Suitable for sensitive eyes and contact lens wearers
  • Fragrance free
  • Suggested to retail for $10.95
L'Oréal Paris® Double Extend™ Eye Illuminator
  • Step 1: Place the brush at the base of the lashes, gently sweeping up to the tip. Step 2: Apply the Illuminating Topcoat after Step One to just the tips of lashes for an everyday look. For a bolder look, apply the pearlescent topcoat from root to tip for a dramatic illuminating effect!

I'm still looking for that "perfect" mascara.  The Double Extend Eye Illuminator didn't excite me as much as the eye shadow did. Don't get me wrong, the mascara is good, but doesn't excel above any others out there.  When I applied the pearlescent topcoat to just the tips of my lashes, I couldn't see it and no one noticed it either.  The second time, I applied it from root to tip for that "dramatic illuminating effect".  I still didn't think it was all that dramatic, but all day long, I kept seeing sparkles in my peripheral vision.  It was really annoying.  I probably won't be using the topcoat much in the future, unless I have a special occasion that requires glitter eyes.  
Earlier this week, when I was wearing both the One Sweep Eye Shadow and the Double Extend Eye Illuminator, Mackenzie commented on my eye makeup about how good it looked (WOW!!  a compliment from my 17 year old daughter??  What did she want?).   I forgot to tell her about it right then because I got distracted.  Yesterday, she was in my bathroom when I was getting ready for church and I pulled the eye shadow and mascara out to put it on.  I remembered what she said about it before and I showed it to her.  She thought the eye shadow was pretty cool and was amazed that it was so easy to put on in just one sweep.  She was like me, thinking it wouldn't really work.  She LOVED the mascara and immediately put it on.  It looked great on her.  Maybe the glitter is better suited for a teen or young adult, not an old mom like me ;-)
This week at CVS, the ExtraCare Coupon Center is giving out $3 off any $10 cosmetic purchase.  Combine that with the $2 off 1 L'Oreal Paris Eye Product from the 4/17/2011 Red Plum insert and you've got a great deal!

23 Mayıs 2012 Çarşamba

Dishwasher Lasagna

To contact us Click HERE
***  FIRST AND FOREMOST ***  This is NOT my recipe and is copied directly from http://www.wikihow.com/Cook-Lasagna-in-Your-Dishwasher.  I'm in the middle of cooking the World's Best Lasagna from Allrecipes and wanted to see how to avoid cooking the lasagna noodles ahead of time because I'm tripling the recipe and I found this.  If anyone tries it, please let me know how it turns out.  Sounds DISS-CUSS-TING to me!!  However, the the World's Best Lasagna truly is the best lasagna I have ever had!
Shock your dinner guest with this fun and unique way to prepare everyone's favorite Italian dish. Do your dishes, cook a meal, and give your guests something to talk about when you make lasagna in your dishwasher.
Ingredients
  • 1/2 jar of favorite pasta sauce
  • 3 fresh lasagna pasta sheets (or 'oven ready' lasagna sheets)
  • 1/2 16.8 oz container of Ricotta cheese
  • 1/2 package of mixed grated cheese
  • 1 cup freshly chopped spinach
  • Garlic
  • Onion flakes
  • Fine herbs

editSteps

  1. 1Cut three 24-inch x 12-inch sheets of aluminum foil and lie flat.
  2. 2Take first lasagna sheet and place flat it in the center of the aluminum foil.
  3. 3Spread a thick layer of pasta sauce over the sheet, covering the entire surface.
  4. 4In a bowl, mix the ricotta cheese and spinach and layer half the mixture on top of the tomato sauce.
  5. 5Layer desired amount of grated cheese, along with fine herbs, garlic, and onion flakes.
  6. 6Top with second lasagna sheet and repeat all layers.
  7. 7Cut third lasagna sheet into strips about 3/8-inch wide and layer on top of lasagna in a criss cross fashion. Top with herbs and spices.
  8. 8Wrap lasagna tightly in the foil by taking the longest sides of the foil and bringing them to meet above the lasagna.
  9. 9Fold the edges of the foil together to make a 'paper bag' effect (like that you would when folding a brown paper lunch bag)above the lasagna. Begin to fold the edges together downward until you are just above the lasagna.
  10. 10Flatten the foil out above the lasagna and fold in the remaining sides like a present, first the sides, then the middle.
  11. 11Two dishwasher lasagnas ready to be cooked Two dishwasher lasagnas ready to be cookedPlace the wrapped lasagna flat in your dishwasher on the bottom rack.
  12. 12Set dishwasher to normal cycle and select 'heated dry' and 'sanitize' settings for maximum heat.
  13. 13Just removed from the dishwasher Just removed from the dishwasherWait for the cycle to complete, then carefully remove lasagna from foil and let stand for a few minutes before serving.

Maybelline Superstay 24 Lipcolor Review with a $2 Coupon!

To contact us Click HERE


Here's Why You'll LOVE it!
  1. No crumbling, caking, no fading, no feathering and no transferring
  2. 2-step lipcolor in one pack
  3. Micro-Flex formula glides on and looks gorgeous all day.
  4. 30 vibrant, runway-inspired colors, divide into four shade families: Reds, Plums, Pinks and Naturals 
  5. Lasts throughout your non-stop 24 hour day.
  6. All-day color in just two steps: Long lasting base coat and Moisturizing top coat balm.
  7. Found in most drug and big box stores like (Target and Walmart) with a suggested retail value of $9.99
"For best results you will need to apply the liquid color to your clean, bare lips. Allow a full two minutes to dry, then apply ultra-conditioning lip balm to seal in softness. Reapply lipbalm as needed. Remove with an oil-based makeup remover."
Now, on to the review and coupon!
My husband and I spent this past weekend wine tasting in Paso Robles, CA.  I decided this would be the ultimate test of a long lasting lipcolor.  One of the most important things about wine tasting is that you don't wear lip color that will transfer to the glasses.  I usually don't wear lip color when wine tasting, but decided to put Maybelline SuperStay 24 to the test.  It passed on all counts!  I applied the lip color in the morning at 10am and we headed out.   Just like all long lasting lip color, it feels extremely dry when you put it on.  Maybelline SuperStay 24 has the moisturizing balm built right in the applicator (on the other end of the lip color), so it is handy all day.  I did have to reapply the moisturizer several times to keep my lips feeling soft.  There was no transfer of lip color to the glasses and my lips still looked great after two wineries.  Then we had lunch...  in all honesty, I did have to reapply my lip color after lunch because I ate a juicy, yummy Gyro sandwich (juicy being the key word... juicy = greasy and lots of wipes of the mouth)   I haven't found any long lasting lip colors that will stand up to anything greasy (I guess that is why it says to remove with an oil-based makeup remover).  So I reapplied and we headed out to 2 more wineries.  My lip color looked fantastic at 4:45 when we returned to the hotel.  We had to rush to dinner and luckily, I didn't need to reapply my lip color (see the picture below), just a quick swipe of the moisturizing balm and I was off for the night!


Click HERE for your $2 Coupon for Maybelline Superstay 24 Lipcolor!
Head over to Maybelline for more information and to see all 30 great shades!
Disclaimer: As a Bzz Agent, I received 4 full size tubes of Maybelline Superstay 24 hour lipcolor before writing this review, and this is my personal opinion of the product.


I have to share the pictures below from our trip.  They don't have anything to do with lip color, but I thought they were so pretty.  There is something about farms that I love!
View from Jack Creek Cellars vineyard
Somebody, get that boy a tractor! (again at Jack Creek)
At Tables Creek Vineyard


L'Oréal® Paris The One Sweep™ Eye Shadow and Double Extend™ Eye Illuminator Mascara

To contact us Click HERE
As you may remember, I'm a BzzAgent.  I get free or discounted products to try out and then I tell my friends what I think about the products.  With one of my most recent BzzCampaigns, I was given L'Oreal The One Sweep Eye Shadow and L'Oreal Double Extend Eye Illuminator mascara.   Here's a little information about them.L'Oréal Paris® The One Sweep™ Eye Shadow
  • Defines, colors and highlights in one easy sweep
  • Features a one-of-a-kind applicator designed to fit the shape of your eye to easily achieve a complete look
  • Coordinated shadows come in natural and playful palettes expertly designed to enhance your eye color
    • Blue
    • Green/Hazel
    • Brown
  • Additional expertly selected palettes available to enhance all eye colors
  • Suggested to retail for $9.95

Expert tips and tricks
Getting the complete and eye-catching looks you want is simple with both L'Oréal Paris® The One Sweep™ Eye Shadow and Double Extend™ Eye Illuminator mascara, but here are a few additional tips from the pros to ensure you always look your best:
L'Oréal Paris® The One Sweep™ Eye Shadow
  • Apply with the darkest shade along your lash line
  • For best results, align the tip of the applicator with the inside corner of your eye — then sweep across your lid for perfectly applied shadow every time
  • Use the applicator to blend upwards across your lid for a truly professional effect

When I got it in the mail, I was pretty skeptical.  I figured the eyeshadow was just another gimmick the makeup companies are putting out to get everyone to try their product.  Let me tell you, I was really surprised!  It really works and is really as easy as advertised.  It was a little awkward applying it the first time (trying to figure out how to hold the applicator and which way to apply it), then I remembered the information that came along with my BzzKit and looked at the picture above and it clicked.  

L'Oréal Paris® Double Extend™ Eye Illuminator

  • Professionally developed to enhance and illuminate your eyes
  • Lengthens, intensifies and illuminates in two simple steps
  • Clump-free, flake and smudge resistant
  • Available in four shades
    • Black Copper for Blue Eyes
    • Black Bronze for Green/Hazel Eyes
    • Black Quartz for Brown Eyes
    • Black Crystal for All Eyes
  • Ophthalmologist- and allergy-tested
  • Suitable for sensitive eyes and contact lens wearers
  • Fragrance free
  • Suggested to retail for $10.95
L'Oréal Paris® Double Extend™ Eye Illuminator
  • Step 1: Place the brush at the base of the lashes, gently sweeping up to the tip. Step 2: Apply the Illuminating Topcoat after Step One to just the tips of lashes for an everyday look. For a bolder look, apply the pearlescent topcoat from root to tip for a dramatic illuminating effect!

I'm still looking for that "perfect" mascara.  The Double Extend Eye Illuminator didn't excite me as much as the eye shadow did. Don't get me wrong, the mascara is good, but doesn't excel above any others out there.  When I applied the pearlescent topcoat to just the tips of my lashes, I couldn't see it and no one noticed it either.  The second time, I applied it from root to tip for that "dramatic illuminating effect".  I still didn't think it was all that dramatic, but all day long, I kept seeing sparkles in my peripheral vision.  It was really annoying.  I probably won't be using the topcoat much in the future, unless I have a special occasion that requires glitter eyes.  
Earlier this week, when I was wearing both the One Sweep Eye Shadow and the Double Extend Eye Illuminator, Mackenzie commented on my eye makeup about how good it looked (WOW!!  a compliment from my 17 year old daughter??  What did she want?).   I forgot to tell her about it right then because I got distracted.  Yesterday, she was in my bathroom when I was getting ready for church and I pulled the eye shadow and mascara out to put it on.  I remembered what she said about it before and I showed it to her.  She thought the eye shadow was pretty cool and was amazed that it was so easy to put on in just one sweep.  She was like me, thinking it wouldn't really work.  She LOVED the mascara and immediately put it on.  It looked great on her.  Maybe the glitter is better suited for a teen or young adult, not an old mom like me ;-)
This week at CVS, the ExtraCare Coupon Center is giving out $3 off any $10 cosmetic purchase.  Combine that with the $2 off 1 L'Oreal Paris Eye Product from the 4/17/2011 Red Plum insert and you've got a great deal!